This digital drawing tutorial is for artists who want to learn how to convert their physical sketches into beautiful digital drawings. We’ll begin with a pencil sketch and finish a nature themed drawing using a digital drawing tablet.
Drawing with a tablet can be a touchy subject among artists who would otherwise consider themselves “traditionalists”. This digital drawing tutorial isn’t meant to take you away from using traditional mediums. I want to teach you how to approach a drawing project with an open mind, using pencil and paper first. If you’re already familiar with converting your physical sketches into digital drawings, skip ahead and get started with the free video lesson, below. Otherwise, please read on!
A quick note – some of the links in this article are Amazon Associate links. Using these links will help support Hike And Draw. Thank you for the love 🙂
Digital Drawing Tutorial
Nature is my greatest inspiration. The beginning of my creative process usually involves hiking through the woods, visiting distant seashores, or climbing mountains. I mention this in order to dispel any preconceptions that digital drawing needs only take place in a dark room far removed from anything resembling physical activity or the human experience. Artists need inspiration, correct? Some visit museums, others strap on SCUBA equipment and jump off a perfectly good boat. I’m not here to judge! My point is that digital drawing can be awesome and that you don’t have to abandon your traditional creative process to explore new territory.
Digital Drawing Tutorial Step 1: Find a Topic Worth Exploring

Digital drawing might be a new frontier for some of you, so it’s important to find something exciting to draw! You already know that I find my inspiration in nature, so let’s look at one of my latest nature journal observations as an example. Keeping a nature journal is one of my favorite hobbies! It’s a fun way to sketch on location and it helps me keep track of ideas, questions and interesting nature drawing prompts while I’m in the field. Digitalize a nature journal entry using a drawing tablet allows you to revisit your experiences in the field while editing out any of the distracting elements. You can learn more about journaling in nature here.
Digital Drawing Tutorial Step 2: Start With Basic Art Supplies

I like processes that are simple and easy to follow, which is why I initially wasn’t a big fan of drawing digitally. However, after many years of tweaking my process, my drawing tablet has become a friend, rather than an enemy. Drawing with a tablet comes with a bit of a learning curve, which we’ll discuss in a bit, so starting with a medium you’re comfortable with helps make getting started less intimidating. Get your ideas down on paper first, then snap a photo of a physical sketch using a smartphone or digital camera.
To participate in the tutorial, you’ll need the following:
- Sketchbook and Pencil
- Smartphone or Digital Camera
- Digital drawing tablet (I use the XP Pen Deco Fun Series Tablet)
- Software (Adobe Photoshop)
Pro Tip:
“If you don’t have time to stop and sketch in nature, take a quick reference photo to bring home with you.”
If you do have time to sketch, here’s a helpful link for preparing a pencil drawing kit.
Digital Drawing Tutorial Step 3: Uploading Your Sketch to PC/MAC
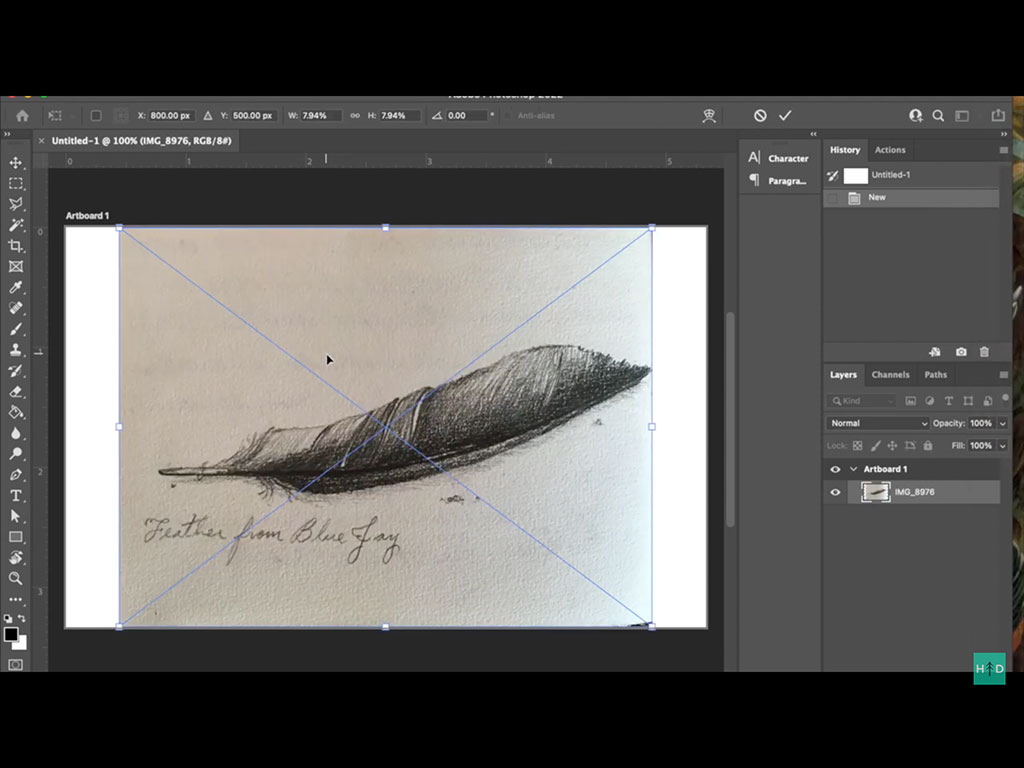
To convert your sketch into a digital file, all you have to do is import a photo of your sketch to your computer. If you’re not familiar with how that works, check out this helpful article for Mac or for your PC.
I like to keep this step simple by using the camera on my iPhone and Airdropping the photo to my laptop. It goes right to my downloads folder in a matter of seconds – no wires or additional software required!
Digital Drawing Tutorial Step 4: Setting Up Your Digital Canvas

Once the photo file is uploaded, proceed to the next step and import the file to Photoshop. Before I do that, I want to make sure my digital drawing canvas is the right size, which can vary based on the project and resolution, which is always at least 300 PPI. Once this step is completed, we import our photo and SAVE THE FILE, (use the .PSD extension). Be sure to frequently save your progress as you draw!
Digital Drawing Tutorial Step 5: Time to Draw

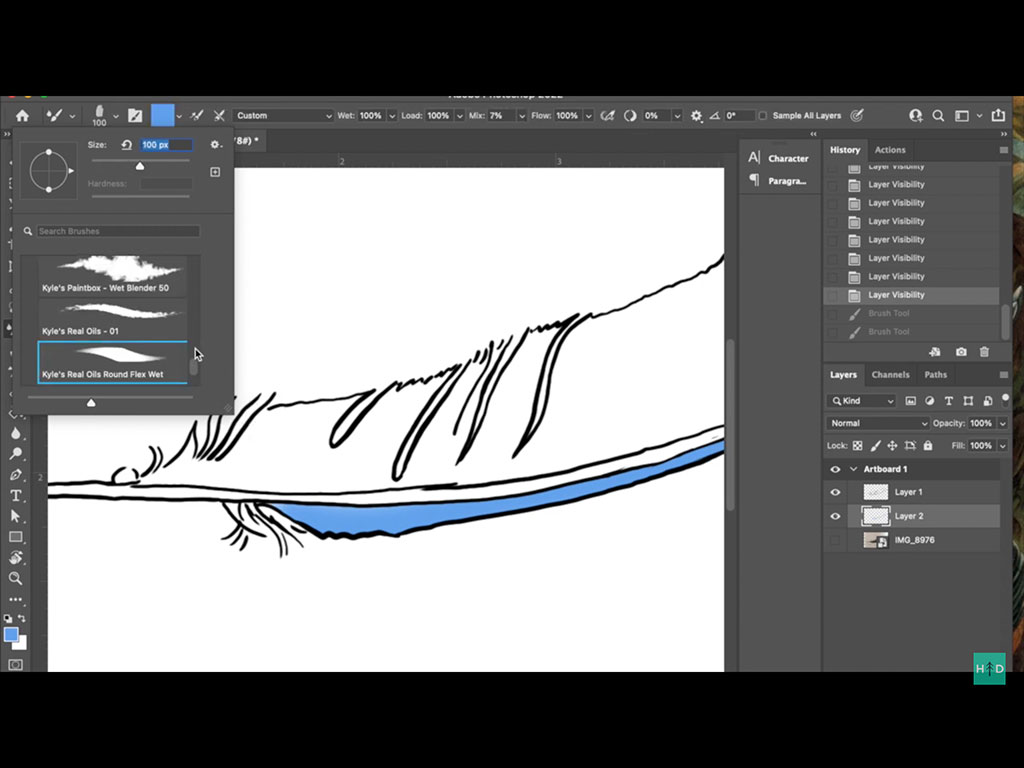
Now that our digital canvas is set up and our photo is imported, we can connect our tablet. If you’re using the same drawing tablet as me, here’s a helpful link that will help you get set up. Once your tablet is connected, create a new layer in Photoshop and select the proper brush. There are a variety of options but we want a brush that is pressure sensitive. That means the thickness of the stroke will be consistent with the pressure we use on our tablet.
Your physical sketch will be your base layer, which should be 50% opacity. Create a new layer and use your brush to draw over your reference. You can keep adding new layers as you begin to include color. Another advantage is being able to change the hierarchy of layers in your project. Once you’re finished, you can export or print your digital drawing.
Looking for something more robust? Check out the XP-PEN Artist12 11.6 Inch FHD Drawing Monitor!
Digital Drawing Tutorial: Next Steps
I hope you found this article helpful! I want to invite you to try a FREE nature drawing video lesson with me. Simply subscribe in the field below.
